JUMP STARTER
MULTI-FUNCTIONAL&
12V/24VJOIN US,BE ONE OF OUR GLOBAL AGENTS!
MULTI-FUNCTIONAL&
12V/24VIt’s a cold winter morning, and you’re rushing to work when your car won’t start. That’s when your jump starter becomes your best friend—but only if you know how to use it safely. With simple guidance and a step-by-step approach, this small device can take you from stranded to back on the road in no time. Let’s dive into everything you need to know to operate your jump starter correctly and avoid mishaps.

Step 1: Preparing Your Jump Starter and Vehicle
First things first—before jumping straight into using your jump starter, make sure both it and your vehicle are ready for the process.
– Charge Your Jump Starter
For a jump starter to work effectively, it needs to be fully charged. Ideally, check its charge level every month to ensure it’s ready when you need it, especially during winter.
– Turn Off All Vehicle Accessories
Make sure that your car’s lights, radio, and AC are switched off. This minimizes power drain and ensures your jump starter can focus fully on getting your car’s battery going.
Step 2: Setting Up the Jump Starter Safely
Proper setup is essential to avoid sparks or electrical hazards.
– Park and Engage the Parking Brake
If possible, use your jump starter on level ground with the parking brake engaged to prevent any accidental rolling.
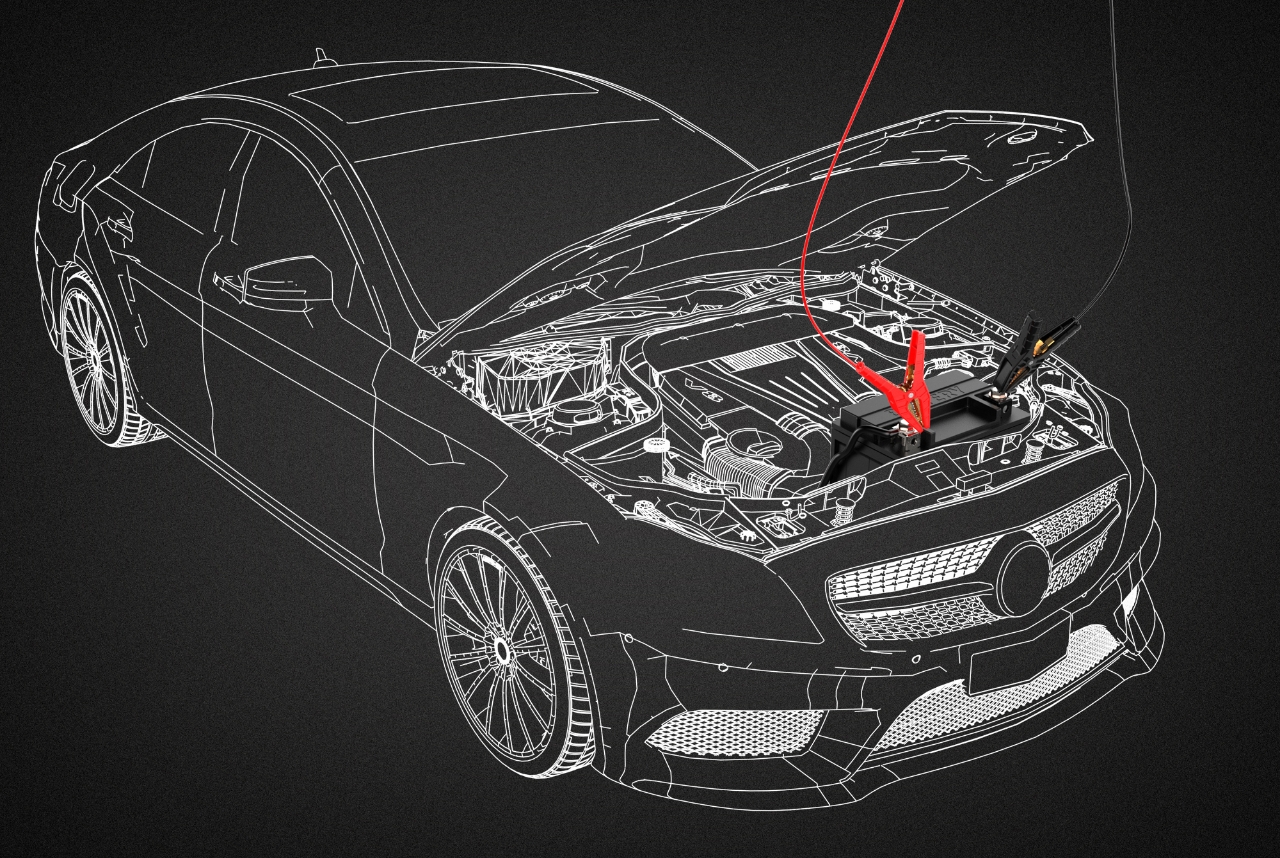
– Locate the Positive and Negative Battery Terminals
Pop the hood of your car, and identify the positive (+) and negative (-) terminals. Usually, the positive is marked in red, and the negative is marked in black.
– Attach the Clamps Correctly
Attach the red clamp to the positive terminal of your car’s battery. Then, attach the black clamp to the negative terminal or a metal part of the car’s frame, a few inches away from the battery.
Step 3: Powering Up the Jump Starter
With the clamps in place, you’re ready to power up the jump starter.
– Turn on the Jump Starter
Most jump starters have a power button—switch it on after securing the clamps. Many modern jump starters feature safety mechanisms to indicate if the clamps are attached correctly.
– Wait a Few Seconds
Allow the jump starter to transfer power for a few moments before trying to start the engine.
Step 4: Starting Your Vehicle
This is the exciting moment! With everything in place, it’s time to start your vehicle.
– Turn the Key or Press Start
Try starting the car. If it doesn’t turn over on the first try, wait about 30 seconds, and try again. Avoid cranking the engine for more than five seconds at a time to prevent damage to the starter motor.
– If Your Car Starts
Great! Leave the car running to let the alternator recharge the battery. Disconnect the clamps in the reverse order: first the black (negative), then the red (positive).
– If Your Car Doesn’t Start
Double-check that the clamps are connected correctly. If your vehicle still doesn’t start, you can use the “Force Mode” or need additional assistance or another battery check.
Step 5: Safely Store the Jump Starter
Your jump starter is a reliable partner in emergencies, but proper storage is key to keeping it in good working order.
– Store in a Cool, Dry Place
Keep the jump starter somewhere stable and at a moderate temperature, like the glove compartment. Avoid leaving it in very hot or freezing conditions, which can degrade the battery.
-Recharge Regularly
Even when unused, batteries gradually lose charge. Check your jump starter’s battery level monthly, especially before long trips, to ensure it’s ready to help when needed.
Additional Safety Tips
Using a jump starter isn’t complicated, but safety is always essential. Here are some extra tips:
– Avoid Using in Wet Conditions
Water and electricity don’t mix well. If possible, use the jump starter only in dry weather to prevent shock.
– Wear Safety Gear
Gloves and protective eyewear add an extra layer of safety.
– Read the Manual
Every jump starter has unique features and specifications. Take a few minutes to read the manual—knowing your specific model helps ensure smooth and safe use.
Ready to Tackle Battery Emergencies?
Mastering how to use a jump starter safely can save you both time and frustration. By following these steps, you’ll be ready to tackle most battery issues without the stress. Still have questions about choosing or maintaining your jump starter? Feel free to reach out—I’d be happy to help you find the best solution for your car care needs.